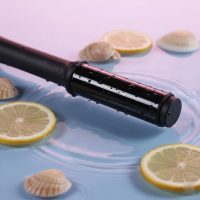
Welcome to Dyesf.com, your trusted haven for all things hair styling! As a seasoned stylist with over a decade of hands-on experience, I’ve seen countless tools come and go, but few brands consistently deliver reliability and innovation like Remington. If you’re looking to elevate your home styling game, diving into the world of a Remington hair curler is an excellent place to start. Whether you dream of bouncy curls, sophisticated waves, or tight ringlets, understanding your tool is the first step to achieving salon-quality results right in your bathroom. We’re here to equip you with the deep expertise and practical tips you need to confidently wield your Remington hair curler and unlock its full potential.

Why Choose a Remington Hair Curler?
Remington has built a formidable reputation over decades, consistently standing out in the competitive hair care industry. They’re not just about making appliances; they’re about empowering you to express your unique style with confidence. What truly sets a Remington hair curler apart is its commitment to combining user-friendly design with cutting-edge technology. From robust build quality to innovative heat-protective features, Remington ensures that you get powerful performance without compromising on your hair’s health. This brand consistently innovates, introducing new collections infused with beneficial ingredients like Keratin and almond oil, designed to give you shiny, healthy-looking curls that last. For more hair curler guides on this site.
Unraveling the Types of Remington Hair Curlers
Remington offers a diverse range of hair curlers, each designed to cater to different styling needs and preferences. Understanding the distinctions will help you pick the perfect Remington hair curler for your desired look.
Classic Curling Irons (Clamping Irons)
This is probably the most familiar type of curler, featuring a barrel with a spring-loaded clamp to hold your hair in place. Classic Remington curling irons are fantastic for creating uniform, traditional curls and waves. They offer excellent control, making them ideal for beginners learning the ropes of curling.
How to Use for Classic Curls:
- Prep: Ensure your hair is dry, detangled, and protected with a heat protectant.
- Section: Divide your hair into manageable sections.
- Clamp & Wrap: Open the clamp, place the end of a hair section under it, then slowly wrap the rest of the hair around the barrel, closing the clamp to secure. For best results, wrap away from your face.
- Hold: Hold for 10-20 seconds, depending on your hair type and desired curl tightness.
- Release: Open the clamp and gently slide the curler out.
Curling Wands (Tapered & Non-Tapered)
|
Our Picks for the Best Hair Curler in 2026
As an Amazon Associate I earn from qualifying purchases.
|
||
| Num | Product | Action |
|---|---|---|
| 1 | TYMO Automatic Rotating Curling Iron - TYMO CURLPRO Beach Waves Curling Wand, Portable Hair Curler, 500 Million Ionic, Dual Voltage & Lightweight for Travel, Ceramic Coating, 1 Inch, Pink |

|
| 2 | TYMO Automatic Rotating Curling Iron - TYMO CURLPRO Beach Waves Curling Wand, Portable Hair Curler, 500 Million Ionic, Dual Voltage & Lightweight for Travel, Ceramic Coating, 1 1/4 Inch, Metallic Gray |
|
| 3 | TYMO Automatic Rotating Curling Iron - TYMO CURLPRO Beach Waves Curling Wand, Portable Hair Curler, 500 Million Ionic, Dual Voltage & Lightweight for Travel, Ceramic Coating, 1 Inch, Metallic Gray |
|
| 4 | Automatic Curling Iron, Auto Hair Curler with 1\" Curling Wand Large Slot & 4 Temperature & 3 Timer, Dual Voltage Anti-Tangle Rotating Curling Iron with Auto Shut-Off for Hair Styling, Champagne |
|
| 5 | Volumizing Hair Brush, Heat Resistant Curling & Blowout Brush with 17 Anti-Slip Teeth for Smooth, Bouncy Curls - Salon Quality at Home, Gentle on All Hair Types |
|
| 6 | Bio Ionic Long Barrel Styler,Curling Iron with Moisture Heat Technology & NanoIonic MX, Verstatile Curling Wand |
|
| 7 | CHIKYO Upgraded 3 Barrel Hair Crimper Waver - 32mm Rovy Wave Curling Iron, 1.25 Inch Ionic Curling Wand, Deep Waver Hair Curler Hot Tool with Ceramic for Women, Dual Voltage, Easy to Use |
|
| 8 | SHEGLAM Automatic Curling Iron 1 1/4 inch with 3 Temperatures Fast Heating, 2-Way Rotation, Anti-Scald, Anti-Tangle Rotating, Automatic Shut-Off for Hair Styling |
|
| 9 | CHI Spin N Curl, Curling Iron For Healthy & Shiny Effortless Curls & Waves, Provides Preset Temperature Settings For Each Hair Texture, Rose Gold |
|
| 10 | Upgraded Automatic Rotating Curling Iron - TYMO CurlPro Plus Long Barrel Curling Wand for Long Hair, Ceramic Hair Curler for Women, Anti-Scald, Tangle-Free, 600M Ionic, Dual Voltage, Gold, 1 Inch |
|
Curling wands differ from irons by lacking a clamp. You manually wrap your hair around the barrel, which often results in more natural-looking curls with softer ends. Remington wands come in two main forms:
- Non-Tapered Wands: These have a consistent barrel diameter, creating curls of the same size from root to tip.
- Tapered Wands: These barrels are wider at the base and narrow towards the tip, producing natural-looking curls that are larger near the root and tighter at the ends. Many stylists, including myself, love tapered wands for creating effortlessly beachy waves.
How to Use for Effortless Waves:
- Prep: Apply heat protectant. Using the included heat-protective glove is highly recommended with wands to prevent burns.
- Section: Take small to medium sections of dry, detangled hair.
- Wrap: Holding the wand with the tip pointing downwards, wrap a section of hair around the barrel, starting from the base closest to the handle and wrapping towards the tip. Ensure strands don’t overlap to allow even heat distribution.
- Hold: Hold for about 5-15 seconds.
- Release: Gently unwind or slide the curl off the wand.
Automatic Curlers
For those who find traditional curling a bit tricky, the automatic Remington hair curler is a game-changer. These innovative tools typically draw sections of hair into a heated chamber, creating perfect curls with minimal effort. They often feature internal computers that remember your settings and heat up from the inside, reducing the risk of burns.
How to Use for Perfect, Consistent Curls:
- Prep: Ensure hair is clean, dry, and completely tangle-free. This is crucial to prevent snags.
- Section: Take small, thin sections of hair. “As Sarah Johnson, our lead stylist at Dyesf.com, often says, ‘Small sections are key to perfectly defined, tangle-free curls with an automatic curler!'”
- Feed: Place a section of hair into the curler’s opening.
- Activate: Press the button, and the curler will automatically draw the hair into the chamber.
- Wait: The device will usually beep when the curl is ready.
- Release: Gently pull the curler away from your head, allowing the curl to fall. Pinning the curls up after styling can help them set and last longer.
Multi-Stylers & Hybrid Tools
Remington also offers versatile multi-stylers that combine several functions into one device, such as 3-in-1 stylers with interchangeable barrels or 2-in-1 straight and curl stylers featuring twisted plates. These are excellent for travelers or those who love to switch up their look frequently, offering incredible value and saving space. The Remington ONE Straight and Curl Styler, for example, allows you to straighten, wave, and curl, proving to be a highly versatile tool.
Decoding Remington Curler Features: What Matters Most?
When choosing your ideal Remington hair curler, several key features will influence its performance and your styling results.
Barrel Materials & Technology (Ceramic, Tourmaline, Titanium, Infused Coatings)
The material of your curler’s barrel significantly impacts heat distribution and hair protection.
- Ceramic: Ceramic barrels heat evenly, reducing hot spots that can damage hair. They provide a smooth, shiny finish and are excellent for most hair types.
- Tourmaline: Often infused with ceramic, tourmaline emits negative ions that help seal the hair cuticle, eliminating frizz and enhancing shine. This is a fantastic choice for hair prone to frizz.
- Titanium: Known for fast and even heat distribution, titanium barrels are durable and ideal for thick, coarse, or hard-to-curl hair. They heat up quickly and maintain high, consistent temperatures.
- Infused Coatings: Remington frequently incorporates advanced ceramic coatings infused with beneficial ingredients like Keratin, almond oil, or Shea Soft. These help to further protect hair from heat damage and leave it looking healthier and shinier.
Temperature Settings & Digital Displays
Precise temperature control is paramount for minimizing heat damage. A good Remington hair curler will offer adjustable heat settings, typically ranging from 130°C to 230°C.
- Fine/Damaged Hair: Opt for lower temperatures (e.g., 130-160°C).
- Normal Hair: Medium temperatures work best (e.g., 160-190°C).
- Thick/Coarse Hair: Higher temperatures (e.g., 190-230°C) may be needed to set curls effectively.
Digital displays allow for accurate temperature selection and monitoring, ensuring you apply just the right amount of heat.
Barrel Sizes: Finding Your Perfect Curl
The barrel diameter directly determines the size and tightness of your curls.
- Small (19mm or less): Perfect for tight ringlets, defined spirals, or curling short hair. The Remington 19mm tong curler is excellent for creating fine, bouncy curls.
- Medium (25-32mm): Ideal for versatile curls, from bouncy to soft waves. This is often a go-to size for many, especially for mid-length hair.
- Large (32mm+): Creates big, loose waves, voluminous curls, or adds body to longer hair. Some multi-stylers even offer different sized barrels for varied looks.
Safety & Convenience (Auto Shut-off, Cool Tip, Swivel Cord, Heat Glove)
Remington prioritizes user safety and convenience.
- Auto Shut-off: A crucial safety feature, automatically turning off the device after a period of inactivity (often 60 minutes), preventing overheating and accidents.
- Cool Tip: A heat-resistant tip on the barrel allows for safe handling and wrapping of hair, minimizing the risk of burns.
- Swivel Cord: A long, rotating power cord offers tangle-free styling and greater flexibility of movement.
- Heat Protective Glove: Many Remington wands include a heat-resistant glove, a lifesaver for protecting your hands while wrapping hair directly around a hot barrel.
Mastering Different Curl Styles with Your Remington Hair Curler
Let’s get down to the art of styling! With your Remington hair curler, you can achieve a myriad of gorgeous looks.
Bouncy Curls & Voluminous Waves
For a glamorous, full-bodied look, you’ll typically use a larger barrel curling iron or a non-tapered wand.
- Prep: Apply a volumizing mousse and heat protectant to dry hair.
- Section: Section your hair horizontally, starting from the bottom. Take 1-inch to 1.5-inch sections.
- Curl: With your Remington hair curler (e.g., a 32mm curling iron), clamp a section of hair near the root (or wrap around a wand) and roll upwards. Hold for 15-20 seconds.
- Set: Gently release the curl and, if desired, pin it to your scalp with a clip while it cools. This helps the curl set and last longer.
- Finish: Once all curls are cool, remove pins (if used) and gently run your fingers through them or use a wide-tooth comb to break them up into voluminous waves. Finish with a flexible hold hairspray.
Loose, Beachy Waves
This relaxed, effortless style is perfectly achieved with a tapered curling wand or a larger barrel non-tapered wand.
- Prep: Lightly spray dry hair with a texturizing spray and heat protectant.
- Section: Take 1-inch sections. For a more natural look, vary the size of your sections slightly.
- Curl: Wrap each section of hair around your Remington hair curler (e.g., a tapered wand), leaving the last inch or two of the ends out to keep that “beachy” un-done look. Alternate the direction of wrapping (some forward, some backward) for a more natural effect. Hold for 5-10 seconds.
- Cool: Let the curls cool completely.
- Finish: Gently shake out your hair, or lightly comb through with your fingers. A sea salt spray can enhance the textured, beachy feel.
Tight Ringlets & Defined Curls
For those adorable, highly defined spirals, a smaller barrel Remington hair curler (19mm or less) is your best friend.
- Prep: Apply a curl-defining cream and heat protectant to dry hair.
- Section: Take very small sections of hair, about ½ inch to ¾ inch.
- Curl: Using your small-barrel Remington hair curler, clamp (or wrap tightly around a wand) a section of hair from root to tip. Ensure the hair is wrapped as tightly as possible without overlapping. Hold for 15-20 seconds.
- Set: Gently release the curl, letting it fall naturally. Avoid touching it until completely cool.
- Finish: Once cool, you can separate the ringlets very gently with your fingers if you desire more volume, or leave them as is for maximum definition. Lock in the look with a strong hold hairspray.
Essential Hair Care: Protecting Your Tresses When Using a Remington Curler
Even the most advanced Remington hair curler uses heat, so protecting your hair is non-negotiable for maintaining its health and shine.
The Power of Heat Protectant
Think of heat protectant as sunscreen for your hair. It creates a barrier that shields your strands from direct heat, preventing damage, breakage, and excessive dryness. Always apply a quality heat protectant generously to dry hair before using any Remington hair curler. Look for formulas that offer protection up to 230°C (450°F).
Optimal Heat Settings for Your Hair Type
Using the correct heat setting is crucial. Too high, and you risk damage; too low, and your curls won’t hold.
- Fine, Thin, or Damaged Hair: Start with the lowest setting, usually around 130-160°C. You might find your hair curls quickly and holds well at lower temperatures.
- Normal to Medium Hair: A mid-range temperature, 160-190°C, is often effective.
- Thick, Coarse, or Hard-to-Curl Hair: You may need higher settings, up to 210-230°C, to ensure the curl sets properly. Always increase heat gradually.
Post-Styling Care for Lasting Curls & Healthy Hair
Your work isn’t done after curling! A few extra steps can make a big difference.
- Cool Down: Allow your curls to cool completely before touching or brushing them. This is key for setting the curl memory.
- Setting Spray: A light mist of hairspray after curling will help lock in your style.
- Gentle Brushing: If you want to soften your curls into waves, use a wide-tooth comb or your fingers, not a paddle brush, to gently loosen them.
- Nourish: Incorporate deep conditioning treatments and hair masks into your routine, especially if you heat style frequently.
Longevity & Performance: Caring for Your Remington Hair Curler
To ensure your Remington hair curler continues to perform at its best and lasts for years, proper care is essential.
Cleaning Your Curler
Hair products can build up on the barrel, reducing its effectiveness and potentially causing uneven heat.
- Unplug and Cool: Always ensure your curler is unplugged and completely cool before cleaning.
- Wipe Gently: Use a soft, damp cloth to wipe down the barrel and handle. For stubborn product residue, a cloth lightly dampened with rubbing alcohol can be used, but avoid abrasive fluids that could damage the coating.
- Dry: Ensure the curler is completely dry before storing or using again.
Proper Storage
Storing your Remington hair curler correctly prevents damage to the barrel and cord.
- Cool, Dry Place: Store it in a cool, dry place, away from humidity.
- Protect the Barrel: If your curler came with a heat-resistant pouch or cover, use it. This protects the barrel’s coating from scratches.
- Cord Care: Never wrap the cord tightly around the hot barrel when storing, as this can damage the internal wiring. Loosely coil the cord instead.
Frequently Asked Questions About Remington Hair Curlers
Q: Can I use my Remington hair curler on wet hair?
A: No, always use your Remington hair curler on completely dry, detangled hair. Using it on wet hair can cause damage and won’t produce effective curls. Some specialized Remington tools, like certain hot air stylers, are designed for damp hair, but a standard curler is not.
Q: How do I prevent my curls from falling flat with a Remington curler?
A: Several factors help curls last: using heat protectant and a styling product (like mousse), ensuring hair is completely dry, choosing the correct heat setting for your hair type, allowing curls to cool completely before touching, and finishing with hairspray. Pinning curls to set while they cool is a pro trick for longevity.
Q: Are Remington curlers dual voltage for travel?
A: Many Remington hair curlers are designed with dual voltage capabilities, making them convenient for international travel. Always check the specific model’s specifications to confirm.
Q: What’s the best Remington curler for short hair?
A: For short hair, a Remington hair curler with a smaller barrel diameter (e.g., 19mm or a tapered wand that narrows significantly) is typically best for creating defined curls or adding volume. Larger barrels might be challenging to wrap short strands around effectively.
Q: How often should I clean my Remington hair curler?
A: It’s a good practice to wipe down your Remington hair curler after every few uses, or whenever you notice product buildup on the barrel. Regular cleaning ensures optimal performance and extends the life of your tool.
Conclusion
Mastering the art of curling at home is entirely achievable with the right tool and technique, and a Remington hair curler is a fantastic choice to add to your styling arsenal. By understanding the different types, features, and proper usage, you’re now empowered to create beautiful, long-lasting curls safely and effectively. Remember to always prioritize hair protection, choose the right barrel size for your desired look, and care for your tool diligently. At Dyesf.com, we believe everyone deserves to feel confident and beautiful, and with your new expertise in the Remington hair curler, you’re well on your way to stunning hair every day. Go ahead, experiment, and let your creativity shine!
Get our weekly buyer guide
Practical specs, not advice. Unsubscribe anytime.