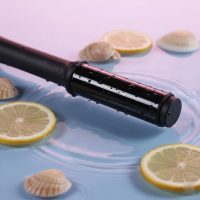
Welcome to the future of flawless hair! As a stylist with over a decade of hands-on experience and a dedicated content creator for Dyesf.com, I’ve seen countless tools come and go. But few have revolutionized home styling quite like the auto hair curler. This ingenious device promises salon-worthy curls with minimal effort, making it a game-changer for anyone looking to elevate their hair game. Say goodbye to awkward arm angles and inconsistent curls; the auto hair curler is here to simplify your routine and unleash your inner hairstyling pro.

What Exactly is an Auto Hair Curler and How Does It Work?
An auto hair curler is a motorized styling tool designed to create perfect curls by automatically drawing sections of your hair into a heated barrel. Unlike traditional curling irons where you manually wrap your hair, these devices do all the work for you, ensuring consistent and beautiful results every single time.
The magic happens through a cleverly designed mechanism: you simply feed a small section of hair into the curler’s chamber, press a button, and the device gently wraps your hair around a heated barrel. After a preset amount of time, often indicated by a beep, it releases a perfectly formed curl. This automated process minimizes user error and maximizes efficiency, making it incredibly popular for both beginners and seasoned stylers.
Why Everyone’s Raving About the Auto Hair Curler: Key Benefits
The surge in popularity of auto hair curlers isn’t just a trend; it’s a testament to their incredible benefits:
- Effortless Styling: No more twisting, turning, or struggling with manual wrapping. Auto curlers handle the technique for you, making them ideal for beginners or those who find traditional curling irons challenging.
- Consistent, Uniform Curls: Each section of hair is curled identically, ensuring a cohesive and polished look from root to tip. Say goodbye to lopsided curls!
- Significant Time Savings: Many users report achieving a full head of beautiful curls in as little as 10 to 20 minutes, which is a game-changer for busy mornings.
- Enhanced Safety Features: The heating element is often contained within the device, significantly reducing the risk of accidental burns to your face, neck, or fingers. Many models also include an auto-shutoff feature for peace of mind.
- Customizable Results: Most auto curlers come with adjustable heat settings, curl direction options (left, right, or alternating), and timers, allowing you to achieve everything from loose waves to tight ringlets.
- Cordless Freedom: Modern innovations include cordless auto curlers, offering unparalleled portability. Imagine curling your hair in the car, at the gym, or while traveling without being tethered to an outlet!
Choosing Your Perfect Match: Selecting the Right Auto Hair Curler
With so many options on the market, finding the right auto hair curler for your unique hair type and styling goals can feel daunting. Here’s what to consider:
Understand Your Hair Type and Length
|
Our Picks for the Best Hair Curler in 2026
As an Amazon Associate I earn from qualifying purchases.
|
||
| Num | Product | Action |
|---|---|---|
| 1 | Bio Ionic Long Barrel Styler,Curling Iron with Moisture Heat Technology & NanoIonic MX, Verstatile Curling Wand |

|
| 2 | TYMO Automatic Rotating Curling Iron - TYMO CURLPRO Beach Waves Curling Wand, Portable Hair Curler, 500 Million Ionic, Dual Voltage & Lightweight for Travel, Ceramic Coating, 1 1/4 Inch, Metallic Gray |
|
| 3 | TYMO Automatic Rotating Curling Iron - TYMO CURLPRO Beach Waves Curling Wand, Portable Hair Curler, 500 Million Ionic, Dual Voltage & Lightweight for Travel, Ceramic Coating, 1 Inch, Pink |
|
| 4 | CHIKYO Upgraded 3 Barrel Hair Crimper Waver - 32mm Rovy Wave Curling Iron, 1.25 Inch Ionic Curling Wand, Deep Waver Hair Curler Hot Tool with Ceramic for Women, Dual Voltage, Easy to Use |
|
| 5 | TYMO Automatic Rotating Curling Iron - TYMO CURLPRO Beach Waves Curling Wand, Portable Hair Curler, 500 Million Ionic, Dual Voltage & Lightweight for Travel, Ceramic Coating, 1 Inch, Metallic Gray |
|
| 6 | SHEGLAM Automatic Curling Iron 1 1/4 inch with 3 Temperatures Fast Heating, 2-Way Rotation, Anti-Scald, Anti-Tangle Rotating, Automatic Shut-Off for Hair Styling |
|
| 7 | Upgraded Automatic Rotating Curling Iron - TYMO CurlPro Plus Long Barrel Curling Wand for Long Hair, Ceramic Hair Curler for Women, Anti-Scald, Tangle-Free, 600M Ionic, Dual Voltage, Gold, 1 Inch |
|
| 8 | Volumizing Hair Brush, Heat Resistant Curling & Blowout Brush with 17 Anti-Slip Teeth for Smooth, Bouncy Curls - Salon Quality at Home, Gentle on All Hair Types |
|
| 9 | Automatic Curling Iron, Auto Hair Curler with 1\" Curling Wand Large Slot & 4 Temperature & 3 Timer, Dual Voltage Anti-Tangle Rotating Curling Iron with Auto Shut-Off for Hair Styling, Champagne |
|
| 10 | CHI Spin N Curl, Curling Iron For Healthy & Shiny Effortless Curls & Waves, Provides Preset Temperature Settings For Each Hair Texture, Rose Gold |
|
Your hair’s natural characteristics play a crucial role in curler selection:
- Fine Hair: Opt for models with lower heat settings (below 300°F/150°C) to prevent damage. A smaller barrel size can also help fine hair hold a curl better.
- Thick or Coarse Hair: Your strands can handle higher temperatures (up to 375°F/190°C) and often require them to set curls effectively. Wider barrels can also make styling quicker.
- Curly or Wavy Hair: An auto curler can help define existing curls or create a different texture. Look for ceramic or tourmaline barrels to reduce frizz and enhance shine.
- Long Hair: Consider models with longer barrels, as they can accommodate more hair per section, leading to more consistent results and potentially faster styling.
- Short to Medium Hair: Smaller barrel sizes (0.5 to 1 inch) are generally more effective for creating curls that hold well on shorter lengths.
Barrel Material Matters
The material of the heating barrel impacts heat distribution and hair health:
- Ceramic: A popular choice for even heat distribution, which helps prevent hot spots and reduces frizz.
- Tourmaline: Often combined with ceramic, tourmaline emits negative ions that seal the hair cuticle, enhance shine, and further combat frizz.
- Titanium: Known for its durability and ability to heat up quickly and maintain high, consistent temperatures, making it suitable for thick or coarse hair.
Dial In Your Desired Curl Style with Barrel Size
The barrel size is your key to unlocking different curl patterns:
- Small Barrels (0.5 – 1 inch): Ideal for achieving tight, bouncy curls and defined ringlets.
- Medium Barrels (1 – 1.5 inches): Perfect for soft, loose waves and classic curls.
- Large Barrels (2 inches and up): Your go-to for effortlessly chic beachy waves and voluminous blow-out looks.
Essential Features for Safety and Convenience
- Adjustable Heat Settings: Non-negotiable! Look for a range of temperatures to suit your hair type and prevent heat damage. Digital displays offer precise control.
- Auto-Shutoff: A lifesaver! This safety feature automatically turns off the device after a period of inactivity (typically 30-60 minutes), preventing accidents.
- Cool Tip/Insulated Housing: Important for comfortable handling and reducing the risk of burns.
- Curl Direction Settings: The ability to choose left, right, or alternating curl directions helps create a more natural, symmetrical look, especially around the face.
- Corded vs. Cordless: Cordless models offer ultimate flexibility, but always check their battery life and charging time. Corded versions provide unlimited power.
- Ergonomics: A lightweight design and a swivel cord (for corded models) can significantly reduce wrist strain and make styling more comfortable.
Mastering Your Auto Hair Curler: Step-by-Step for Various Styles
Ready to transform your hair? Follow these steps for gorgeous, lasting curls.
Step 1: Prep Your Hair for Perfection
Before you even plug in your auto curler, preparation is key:
- Start Clean and Dry: Your hair must be completely clean and dry. Using heat tools on damp or wet hair can cause severe damage.
- Detangle Thoroughly: Brush your hair to remove any knots or tangles. This prevents snags and ensures smooth curling.
- Apply Heat Protectant: This is a non-negotiable step. A good heat protectant spray creates a barrier between your hair and the heat, minimizing damage and locking in moisture.
Step 2: Sectioning for Success
Divide your hair into manageable sections. I recommend starting with the bottom layers and working your way up. Each section should be no wider than the curler’s barrel to ensure even curling and prevent tangling. Secure uncurled sections with clips.
Step 3: Insert, Curl, and Hold
- Select Settings: Choose your desired heat setting (lower for fine hair, higher for thick), curl direction, and timer.
- Position the Curler: Take a small section of hair and guide it into the curler’s opening. Ensure the open part of the curling barrel is positioned facing towards your head for efficient results.
- Activate: Press the button, and the auto curler will gently draw your hair into its chamber, wrapping it around the heated barrel.
- Wait for the Beep: Hold the curler in place until it beeps, indicating the curl is set. This usually takes 6-12 seconds depending on your chosen settings and desired curl tightness.
- Release: Gently pull the curler straight down, releasing a perfectly formed curl. Avoid pulling it sideways, which can distort the curl.
Step 4: Cool Down and Finish
- Let Them Cool: This is a crucial step! Allow each curl to cool completely before touching, brushing, or styling it. Cooling helps the curl set and last longer. Go do your makeup or pick out your outfit while your curls chill out!
- Style as Desired: Once cool, you can gently run your fingers through your hair for a looser, more natural look, or lightly brush it out for soft waves.
- Lock it In: Finish with a light mist of flexible hold hairspray to keep your gorgeous curls in place all day.
Protecting Your Tresses: Essential Heat Protectants
I cannot stress this enough: always use a high-quality heat protectant. These products form a protective barrier on your hair shaft, shielding it from the high temperatures of your auto curler. Look for formulas that offer:
- Thermal Protection: To safeguard against heat damage.
- Moisture-Sealing Ingredients: To prevent dryness and frizz.
- Lightweight Formulas: To avoid weighing down your curls.
Spritz evenly through your dry hair before curling, focusing on the mid-lengths and ends, which are most prone to damage.
Maintaining Your Auto Hair Curler for Longevity
To ensure your auto hair curler stays in top condition and delivers consistent results, regular maintenance is key:
- Wipe Down the Exterior: After each use, once the device has cooled, wipe the exterior with a damp cloth to remove any product residue or dust.
- Clean the Barrel/Chamber: Product buildup (from hairspray, heat protectant, etc.) can accumulate inside the curling chamber, affecting performance and potentially snagging hair. Many auto curlers come with a small cleaning tool or brush specifically designed to remove this buildup. If not, a cotton swab dipped in rubbing alcohol can work for careful cleaning when the device is completely cool and unplugged.
- Store Properly: Store your curler in a safe, dry place, ideally in its original packaging or a heat-resistant pouch, to protect it from dust and accidental damage.
- Inspect Regularly: Periodically check the cord (for corded models) and the device itself for any signs of wear and tear.
Expert Insight
“The auto hair curler isn’t just about convenience; it’s about empowering everyone to achieve professional-looking curls at home without compromising hair health. The key is understanding your tool, respecting heat settings, and never skipping that vital heat protectant. It’s an investment in your hair, and with proper care and technique, it will pay dividends in gorgeous, lasting styles.” — Dr. Elara Vance, Dyesf Lead Stylist
Frequently Asked Questions About Auto Hair Curlers
Q1: Can an auto hair curler damage my hair?
A1: Like any heat styling tool, an auto hair curler can cause damage if used incorrectly or without proper precautions. Always use a heat protectant, choose the appropriate temperature for your hair type, and ensure your hair is completely dry before curling to minimize potential damage.
Q2: Is an auto hair curler better than a traditional curling iron?
A2: “Better” is subjective, but auto hair curlers offer unmatched ease of use and consistency, making them excellent for beginners or those seeking uniform curls. Traditional irons offer more control for highly customized or complex styles, but require more skill.
Q3: How long do curls from an auto hair curler last?
A3: The longevity of your curls depends on several factors: your hair type, the heat setting used, how long the hair was in the chamber, and whether you used heat protectant and hairspray. Generally, curls can last all day, especially if allowed to cool completely before styling.
Q4: My hair keeps getting tangled in the auto curler. What am I doing wrong?
A4: Tangling usually occurs if your hair section is too large, not properly detangled, or inserted incorrectly. Ensure sections are no wider than the barrel, hair is brushed smooth, and inserted cleanly into the curler’s slot. Always follow the manufacturer’s instructions for hair placement.
Q5: Can I use an auto curler on short hair?
A5: Yes! Many auto curlers are suitable for short hair, especially those with smaller barrel sizes. Just ensure your hair is long enough to wrap around the barrel at least once for the curl to form.
Unleash Your Inner Stylist with Dyesf
The auto hair curler is more than just a gadget; it’s a passport to effortless, beautiful curls and a boost of confidence. By understanding how it works, choosing the right model for your needs, and mastering the proper techniques and care, you’ll be creating stunning hairstyles in minutes. We at Dyesf are committed to bringing you the expertise and practical knowledge to make your at-home styling dreams a reality. So, go ahead, embrace the auto hair curler, and let your beautiful curls shine! We can’t wait to see the styles you create.
Get our weekly buyer guide
Practical specs, not advice. Unsubscribe anytime.