Achieving stunning, salon-worthy curls at home is easily possible with a hair curler wand, a versatile heating tool that creates natural-looking curls and waves without clamps. Unlike traditional curling irons, a wand requires manually wrapping hair sections around its heated barrel, resulting in seamless, kink-free styles. This guide from Dyesf.com, drawing on over a decade of practical experience, provides essential techniques and tips for mastering your hair curler wand while maintaining hair health.
What Exactly is a Hair Curler Wand? (And Why You’ll Love It)
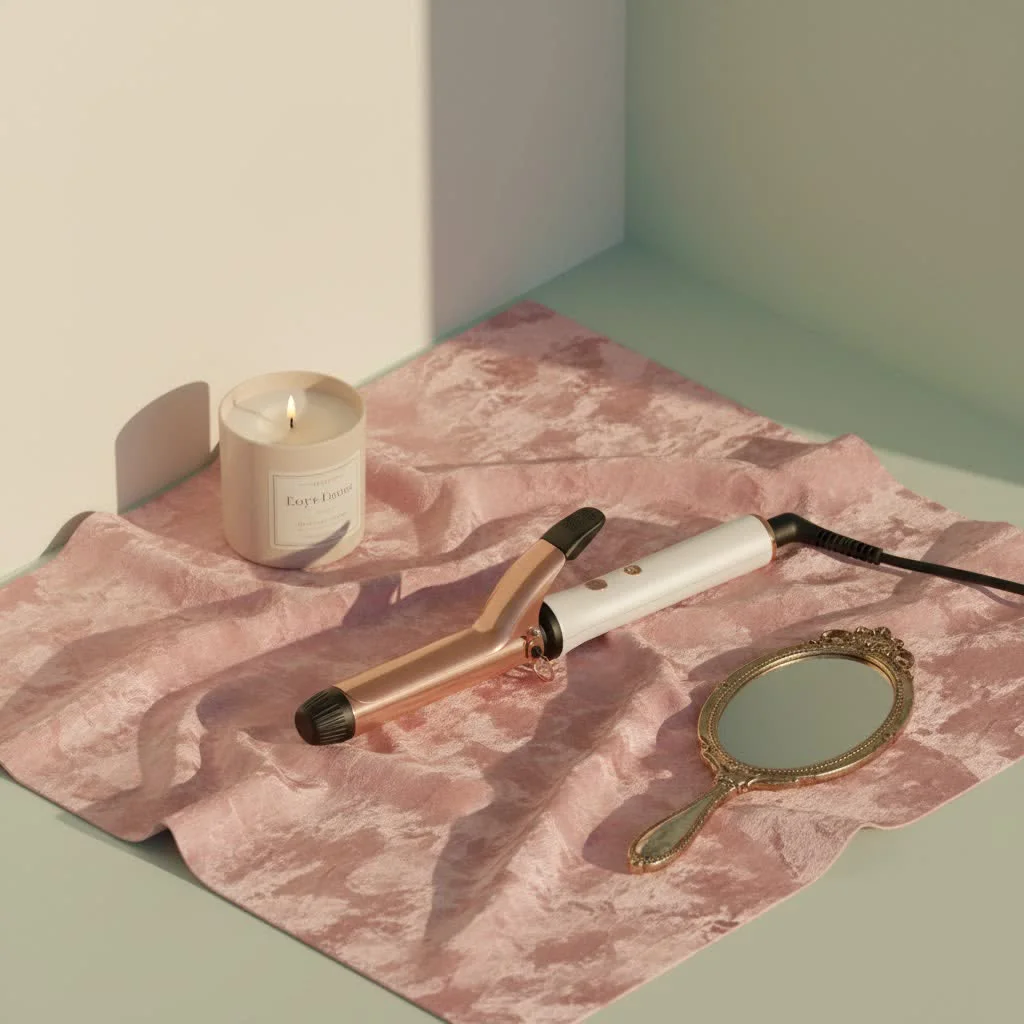
At its core, a hair curler wand is a cylindrical heating tool designed to create curls and waves. Unlike traditional curling irons, a wand famously lacks a clamp. This key difference means you manually wrap sections of hair around the heated barrel, holding them in place for a few seconds before releasing. The result? More natural, effortless-looking curls and waves that seamlessly blend into your hairstyle, free from the dreaded clamp marks or kinks that can sometimes appear with a traditional iron. This clip-free design minimizes creases, leading to smoother, more natural-looking results.
This simple design difference makes the hair curler wand incredibly versatile, allowing you to experiment with a wide array of looks, from casual beachy waves to bouncy, romantic curls. Whether you’re aiming for a tousled, lived-in style or a more polished finish, the wand offers unparalleled freedom to express your creativity.
Choosing Your Perfect Hair Curler Wand: A Match Made in Hair Heaven
Finding the ideal hair curler wand isn’t about picking the prettiest one; it’s about matching the tool to your unique hair type, length, and desired curl. Think of it as finding the perfect dance partner – the right one makes all the difference!
Barrel Size: The Key to Your Desired Curl
The size and shape of your wand’s barrel are paramount in determining the kind of curl you’ll achieve.
- Smaller Barrels (0.5 to 1 inch): Want tight ringlets or defined, bouncy curls? A smaller barrel is your best friend. It’s also fantastic for adding volume to shorter hair or creating more intricate, vintage-inspired styles.
- Medium Barrels (1 to 1.25 inches): For those seeking versatile, natural-looking curls and soft waves that aren’t too tight or too loose, a medium-sized barrel hits that sweet spot. It’s often ideal for medium-length hair.
- Larger Barrels (1.25 to 2 inches): If loose, flowing waves, relaxed beach curls, or adding significant volume to longer, thicker hair is your goal, reach for a larger barrel. The bigger the barrel, the looser and softer your curls will be.
- Tapered Wands: These innovative wands feature a barrel that’s wider at the base and narrower at the tip. They’re excellent for creating natural-looking waves that start fuller at the roots and gradually narrow towards the ends, mimicking natural hair growth patterns.
Material Matters: Ceramic, Tourmaline, or Titanium?
|
Our Picks for the Best Hair Curler in 2026
As an Amazon Associate I earn from qualifying purchases.
|
||
| Num | Product | Action |
|---|---|---|
| 1 | Bio Ionic Long Barrel Styler,Curling Iron with Moisture Heat Technology & NanoIonic MX, Verstatile Curling Wand |

|
| 2 | Volumizing Hair Brush, Heat Resistant Curling & Blowout Brush with 17 Anti-Slip Teeth for Smooth, Bouncy Curls - Salon Quality at Home, Gentle on All Hair Types |
|
| 3 | Upgraded Automatic Rotating Curling Iron - TYMO CurlPro Plus Long Barrel Curling Wand for Long Hair, Ceramic Hair Curler for Women, Anti-Scald, Tangle-Free, 600M Ionic, Dual Voltage, Gold, 1 Inch |
|
| 4 | CHI Spin N Curl, Curling Iron For Healthy & Shiny Effortless Curls & Waves, Provides Preset Temperature Settings For Each Hair Texture, Rose Gold |
|
| 5 | Automatic Curling Iron, Auto Hair Curler with 1\" Curling Wand Large Slot & 4 Temperature & 3 Timer, Dual Voltage Anti-Tangle Rotating Curling Iron with Auto Shut-Off for Hair Styling, Champagne |
|
| 6 | TYMO Automatic Rotating Curling Iron - TYMO CURLPRO Beach Waves Curling Wand, Portable Hair Curler, 500 Million Ionic, Dual Voltage & Lightweight for Travel, Ceramic Coating, 1 1/4 Inch, Metallic Gray |
|
| 7 | TYMO Automatic Rotating Curling Iron - TYMO CURLPRO Beach Waves Curling Wand, Portable Hair Curler, 500 Million Ionic, Dual Voltage & Lightweight for Travel, Ceramic Coating, 1 Inch, Pink |
|
| 8 | TYMO Automatic Rotating Curling Iron - TYMO CURLPRO Beach Waves Curling Wand, Portable Hair Curler, 500 Million Ionic, Dual Voltage & Lightweight for Travel, Ceramic Coating, 1 Inch, Metallic Gray |
|
| 9 | CHIKYO Upgraded 3 Barrel Hair Crimper Waver - 32mm Rovy Wave Curling Iron, 1.25 Inch Ionic Curling Wand, Deep Waver Hair Curler Hot Tool with Ceramic for Women, Dual Voltage, Easy to Use |
|
| 10 | SHEGLAM Automatic Curling Iron 1 1/4 inch with 3 Temperatures Fast Heating, 2-Way Rotation, Anti-Scald, Anti-Tangle Rotating, Automatic Shut-Off for Hair Styling |
|
The material your hair curler wand is made from directly impacts heat distribution, hair health, and the overall longevity of your style.
- Ceramic: A popular choice for many, ceramic barrels distribute heat evenly, minimizing damaging hot spots. They’re generally considered suitable for most hair types, especially fine or normal hair, and can help to smooth frizz. However, ceramic can be more fragile.
- Tourmaline: For those battling frizz and seeking extra shine, tourmaline is a fantastic option. This gemstone material emits a higher number of negative ions when heated compared to ceramic. These negative ions help to seal the hair’s cuticle, locking in moisture, reducing frizz, and leaving your hair smoother and shinier. Tourmaline is gentle enough for all hair types and can help prevent heat damage by allowing for effective styling at lower temperatures.
- Titanium: Known for its rapid heating and durability, titanium wands are often the choice of professionals and are particularly effective for styling thick, coarse, or stubborn hair. They can maintain high heat settings for longer, sealing in natural oils and moisture while eliminating frizz. While powerful, beginners should use titanium wands with caution as their intense heat can potentially cause more damage if not used correctly.
Temperature Control: Your Hair’s Best Friend
Having adjustable temperature settings on your hair curler wand is non-negotiable for protecting your hair from unnecessary heat damage. Different hair types require different heat levels to curl effectively and safely.
- Fine or Damaged Hair: Keep the heat low, ideally between 200°F and 300°F (90°C and 150°C). Lower temperatures help prevent breakage and further damage to delicate strands.
- Medium or Normal Hair: A range of 300°F to 380°F can work well, providing enough heat to set the curl without over-exposing the hair.
- Thick, Coarse, or Stubborn Hair: These hair types often require higher temperatures, typically between 350°F and 450°F (180°C and 230°C), to form and hold a curl. Even with higher heat, it’s crucial to work quickly and not hold the hair on the barrel for too long.
Mastering the Art of Curling: Step-by-Step with Your Hair Curler Wand
Learning to wield your hair curler wand effectively takes a little practice, but with these steps, you’ll be creating stunning curls in no time.
Preparation is Power: Before You Curl
- Start with Dry Hair: This is a golden rule! Always ensure your hair is completely dry before applying heat. Curling damp or wet hair can cause significant damage by essentially boiling the water within your hair shaft.
- Apply Heat Protectant: Consider this your hair’s superhero. A good heat protectant spray or serum creates a protective barrier between your hair and the heat, significantly reducing thermal damage. Apply it evenly, section by section, from roots to ends, ensuring every strand is coated. Look for products that offer protection up to 450°F (230°C).
- Section Your Hair: This step is crucial for consistent results. Divide your hair into manageable sections (usually 1-inch sections for thick hair, 1-2 inches for thinner hair) using clips. Smaller, even sections ensure uniform heat distribution and better-formed curls.
- Expert Insight from Dyesf’s Lead Stylist, Sophia Chen: “Proper sectioning isn’t just about neatness; it’s about control. It allows the heat to penetrate each strand evenly, giving you a beautiful, long-lasting curl without over-exposing your hair to heat.”
The Curling Technique: Wrap, Hold, Release
- Position the Wand: Hold your hair curler wand with the barrel pointing downwards. This often feels more natural and helps create a more organic flow to the curls.
- Wrap Your Hair: Take one section of hair, starting about an inch or two from the root, and wrap it around the barrel. For a more defined look, wrap flat; for looser waves, twist the hair before wrapping. Always wrap away from your face for a flattering effect. Ensure the hair is wrapped smoothly, without overlapping too much.
- Hold and Release: Hold the hair around the wand for about 8 to 10 seconds. For very fine or damaged hair, you might hold for less time (5-7 seconds), and for very thick or coarse hair, slightly longer (up to 15 seconds) if necessary, but never exceed this. Gently release the curl into your palm and allow it to cool completely before touching or disturbing it. This cooling process is vital for the curl to set and last.
- Repeat: Continue section by section, working your way around your head. Many prefer to start at the back, move to the sides, and finish with the front sections.
Pro Tips for Different Curl Styles
- Beachy Waves: Use a medium to large barrel. After releasing each curl, gently pull down on the warm section of hair to elongate the curl into a wave. You can also alternate the direction of wrapping each section for a more natural, undone look. Finish with a texturizing spray.
- Bouncy Curls: Use a smaller to medium barrel. After releasing, pin each hot curl to your scalp to cool completely. Once all curls are cool, remove the pins and gently brush through with a wide-tooth comb or your fingers for maximum bounce.
- Soft, Glamorous Waves: Opt for a large barrel. Wrap larger sections of hair, ensuring they lie flat against the barrel. Brush through with a soft bristle brush once cool to create a uniform, Hollywood wave effect.
Protecting Your Tresses: Essential Hair Care While Using a Curler Wand
Using a hair curler wand can be incredibly fun and transformative, but consistent heat styling requires a commitment to hair health.
The Non-Negotiable Heat Protectant
We cannot stress this enough: always use a high-quality heat protectant. This product forms a crucial barrier, shielding your hair from direct thermal damage. It’s the first line of defense against split ends, breakage, and dullness caused by hot tools.
Hydration is Key: Pre and Post-Curl Care
Heat styling can dry out your hair. Counteract this by incorporating hydrating practices into your routine:
- Shampoo and Condition: Use a gentle, sulfate-free shampoo and a deeply moisturizing conditioner to keep your hair hydrated and resilient.
- Deep Conditioning: Treat your hair to a nourishing mask once a week. Ingredients like argan, coconut, or avocado oils are excellent for replenishing moisture.
- Leave-in Conditioners and Serums: These lightweight products can lock in moisture and keep your strands soft and manageable throughout the day, without weighing down your curls.
Smart Styling Habits for Healthy Hair
- Don’t Overdo It: While tempting, daily heat styling can take a toll. Try to limit the use of your hair curler wand to a few times a week. On non-styling days, use dry shampoo or refresh existing curls.
- Style on Dry Hair Only: This cannot be emphasized enough. Styling damp hair with heat tools is a surefire way to cause severe damage.
- Listen to Your Hair: Pay attention to how your hair responds to heat. If you notice increased dryness, frizz, or breakage, reassess your heat settings and styling frequency.
Keeping Your Hair Curler Wand in Top Shape: Maintenance Tips
A well-maintained hair curler wand not only performs better but also lasts longer, saving you money and hassle in the long run. Proper care also protects your hair from sticky product buildup.
- Turn Off and Cool Down: Always turn off and unplug your wand immediately after use. Allow it to cool down completely on a heatproof mat before storing it away. This prevents heat damage to surfaces and protects the tool itself.
- Clean Regularly: Product buildup from heat protectants, hairsprays, and mousses can accumulate on the barrel. This residue can transfer to your hair, causing sticking and even burning. After each use, once the wand is cool, gently wipe the barrel with a damp cloth to remove any buildup.
- Store Properly: Avoid wrapping the cord tightly around the hot barrel, as this can damage the cord over time. Never hang your wand by its cable, as this can loosen the internal wiring. Store it in a designated drawer or heat-resistant pouch.
- Avoid Damp Environments: Bathrooms, while convenient, can be damp. Keep your hair curler wand away from water to prevent electrical hazards and prolong its life.
Expert Insight: “Confidence in Every Curl”
“At Dyesf, we believe that a hair curler wand is more than just a tool; it’s an extension of your personal style. It empowers you to create looks that reflect your mood, your outfit, your very essence,” says Sophia Chen, Lead Stylist and Content Creator at Dyesf.com. “The confidence you feel with perfectly styled hair is unmatched, and with the right knowledge and technique, you can achieve that feeling every single day, safely and effectively.”
Conclusion
The hair curler wand is a truly indispensable tool for anyone looking to embrace the beauty of curls and waves. By understanding the nuances of barrel size, material, and temperature, you can select the perfect wand for your hair type and desired style. Mastering the techniques, coupled with diligent heat protection and proper tool maintenance, ensures you not only create stunning looks but also maintain the health and vibrancy of your hair. We at Dyesf.com are committed to being your trusted resource on this exciting journey. So go ahead, experiment, express yourself, and let your hair curler wand unlock a world of beautiful possibilities. Visit Dyesf.com for more expert tips and to explore our curated selection of top-notch hair styling essentials!
Frequently Asked Questions
What is the main difference between a hair curler wand and a curling iron?
The main difference is that a hair curler wand lacks a clamp, requiring you to manually wrap hair around the barrel. This design prevents clamp marks and kinks, resulting in more natural-looking curls and waves compared to traditional curling irons.
How do I choose the correct barrel size for my desired curl?
Barrel size dictates curl type: 0.5 to 1 inch creates tight ringlets, 1 to 1.25 inches yields natural-looking curls and soft waves, and 1.25 to 2 inches produces loose, flowing waves. Tapered wands create natural-looking waves that are fuller at the roots and narrower at the tips.
What temperature should I use on my hair curler wand?
The ideal temperature depends on your hair type. Fine or damaged hair should use 200u00b0F-300u00b0F (90u00b0C-150u00b0C), medium hair 300u00b0F-380u00b0F, and thick or coarse hair 350u00b0F-450u00b0F (180u00b0C-230u00b0C). Always use the lowest effective temperature to prevent damage.
Why is heat protectant essential when using a hair curler wand?
Heat protectant is crucial because it forms a protective barrier between your hair and the heat, significantly reducing thermal damage. This prevents split ends, breakage, and dullness, safeguarding your hair's health and vibrancy during heat styling.
How often should I clean my hair curler wand?
You should clean your hair curler wand regularly, ideally after each use once it has cooled down. Product buildup from heat protectants and hairsprays can accumulate on the barrel, which can transfer to your hair, causing sticking and potential burning.
Mastering Your Hair Curler Wand for Effortless Curls
Learn the step-by-step process to effectively use a hair curler wand, from preparation to styling, ensuring beautiful and long-lasting curls while protecting your hair.
Always start with completely dry hair to prevent damage. Apply a high-quality heat protectant spray or serum evenly from roots to ends, ensuring every strand is coated. Section your hair into manageable 1-2 inch sections using clips for consistent results.
Hold the wand with the barrel pointing downwards. Take one section of hair, starting an inch or two from the root, and wrap it smoothly around the barrel, away from your face. Avoid overlapping too much hair on the barrel.
Hold the hair around the wand for 8 to 10 seconds; adjust to 5-7 seconds for fine hair or up to 15 seconds for thick hair. Gently release the curl into your palm and allow it to cool completely before touching or disturbing it. This cooling process is vital for the curl to set and last.
Continue this process section by section, working your way around your head, typically starting from the back. Once all sections are curled and cooled, gently brush through with a wide-tooth comb or your fingers to achieve your desired curl style, such as beachy waves or bouncy curls.
Get our weekly buyer guide
Practical specs, not advice. Unsubscribe anytime.
I’ve always struggled with traditional curling irons leaving kinks, so I was really excited to try a wand after reading about the clamp-free design. This guide’s tips on wrapping hair sections manually made such a difference! My curls look so much more natural and seamless now. Definitely a game-changer for my morning routine.
I’m a total beginner when it comes to styling my hair, and the thought of using a curler wand was intimidating. But the explanation of how it creates natural-looking curls without clamps really convinced me to try. My first few attempts were a bit messy, but following the techniques for maintaining hair health has kept my hair from getting damaged. I’m slowly getting better!
The idea of a hair curler wand for natural waves sounded great, and it does work. However, I found it a bit tricky to hold the hair in place without a clamp, especially on my shorter layers. It takes some practice to get the hang of it, and I’ve burned my fingers a couple of times. Maybe a heat-resistant glove should be mentioned more prominently for beginners.
I’ve been using a curling iron for years, but the curls always looked a bit too ‘done.’ The description of how a wand creates more natural, kink-free styles really resonated with me. I finally invested in one, and the difference is incredible. My hair looks effortlessly wavy, just like I wanted. So glad I made the switch!